
How to Patch and Repair Drywall Like a Pro: A Step-by-Step Guide
Drywall repairs can seem daunting, but with the right tools and techniques, you can fix holes, cracks, and dents like a pro. Whether you're dealing with a small hole from a doorknob or a larger crack in the wall, this step-by-step guide will show you how to tackle the repair process efficiently and effectively.
Step 1: Gather Your Materials and Tools
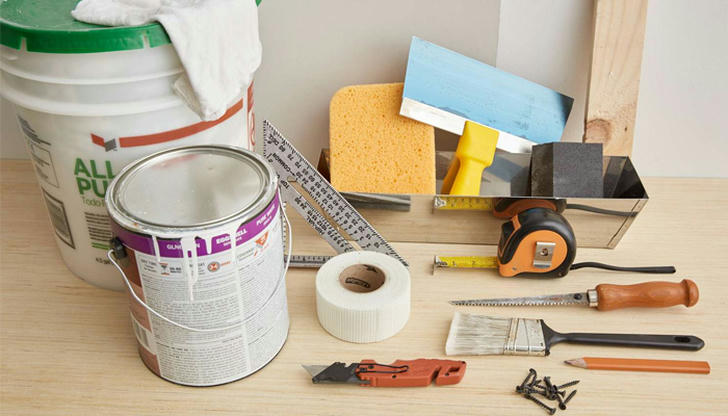
Before diving into your drywall repair, make sure you have everything you need. Here's what you'll need to get started:
Materials:
Joint compound (drywall compound)
Spackling paste (for small holes)
Drywall patch (for larger holes)
Primer and paint (for finishing)
Tools:
Putty knives (various sizes)
Utility knife
Sanding block or sandpaper (medium and fine grit)
Drywall saw (for cutting large holes)
Corner bead (for corner repairs)
Safety gear (dust mask, gloves)
Step 2: Prepare the Area for Repair
How to Prepare:
Clear the Space: Move furniture or cover it with a drop cloth to prevent dust and debris from damaging it.
Outline the Damaged Area: Use a pencil to mark the damaged area, creating a clear outline to guide your cutting or patching.
Cut the Damaged Drywall: For larger holes or cracks, use a utility knife to cut around the damaged area, making it a clean rectangle or square. This ensures the patch fits smoothly.
Step 3: Repair Small Holes (Less Than 1 Inch)
How to Repair:
Clean the Hole: Remove any loose drywall debris using a utility knife or putty knife. This allows the repair material to adhere better.
Apply Spackling Paste: Using a putty knife, spread spackling paste into the hole, filling it completely. Smooth the surface to make it even with the wall.
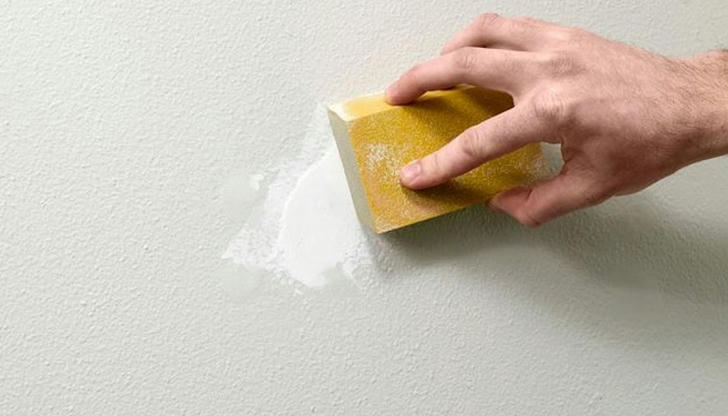
Sand the Area: Once the paste has dried (usually within a few hours), lightly sand it using fine-grit sandpaper until the surface is smooth and level.
Prime and Paint: Apply a coat of primer to the patched area and let it dry. Then, paint it with the same color as the surrounding wall.
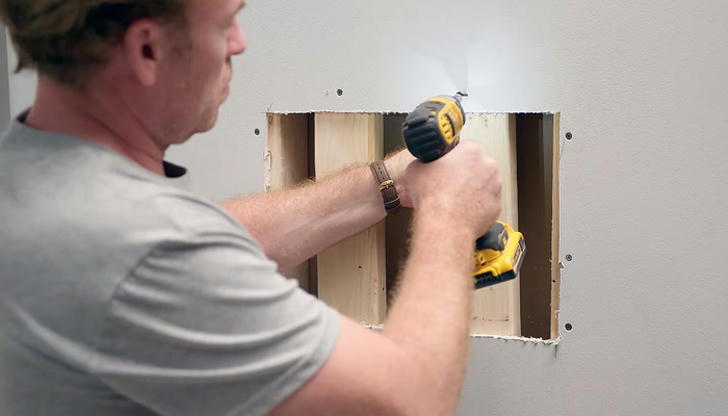
Step 4: Repair Medium-Sized Holes (1-6 Inches)
How to Repair:
Cut a Drywall Patch: Measure the hole and cut a piece of drywall that's slightly larger than the hole. Use a utility knife to trim both the wall and the patch for a perfect fit.
Install the Patch: If there's no stud to attach the patch, use a piece of wood to create support. Secure the patch to the wall using screws or drywall adhesive.
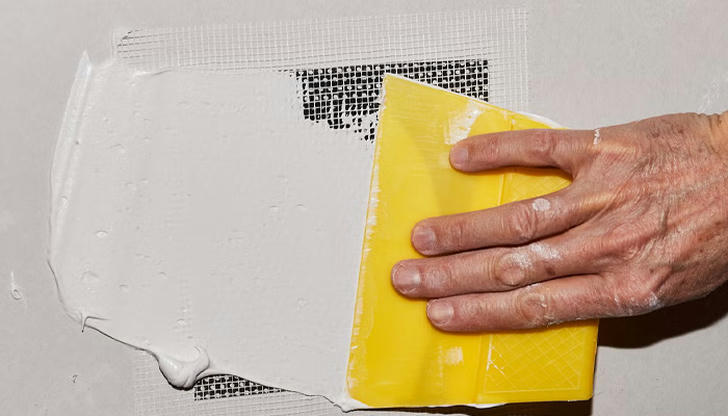
Apply Joint Compound: Spread a thin layer of joint compound around the edges of the patch, extending slightly beyond the patch to blend it into the wall. Smooth it out using a putty knife.
Sand and Apply Additional Compound: Once the compound dries (usually after 24 hours), sand it smooth. Apply additional compound layers if necessary to ensure a seamless finish.
Prime and Paint: After the compound is fully dry and smooth, apply primer, and then paint to match the wall color.
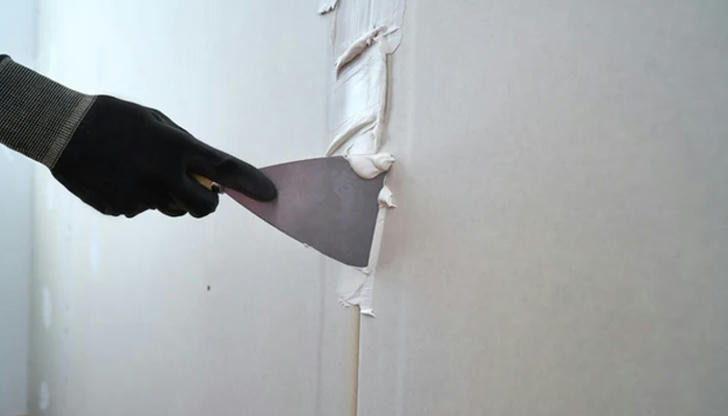
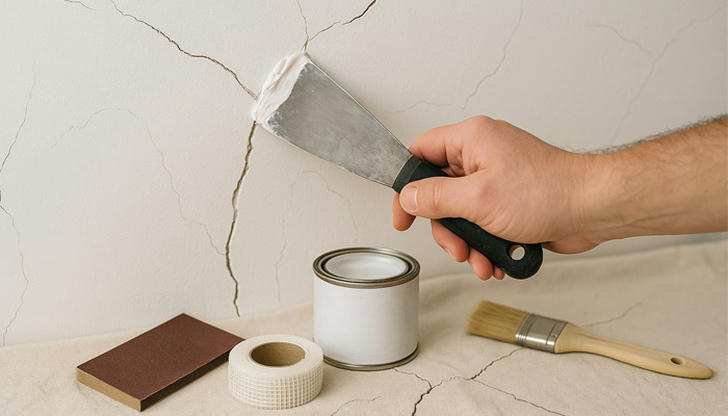
Step 5: Fix Cracks in Drywall
How to Repair:
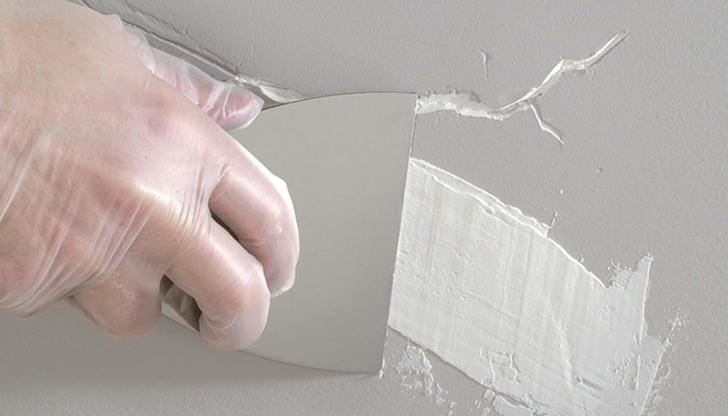
Widen the Crack: Use a utility knife to slightly widen the crack into a V-shape. This helps the joint compound fill the crack properly and prevents it from reopening.
Apply Joint Compound: Spread a generous amount of joint compound into the crack using a putty knife. Smooth it out so it's level with the surrounding wall.
Add Drywall Tape (for Larger Cracks): If the crack is wide, apply drywall tape over the crack before adding more compound. This reinforces the repair and prevents future cracking.
Sand Smooth: After the compound dries, sand the area until it's smooth and flush with the rest of the wall.
Prime and Paint: Apply primer and then paint to the patched area to finish the job.
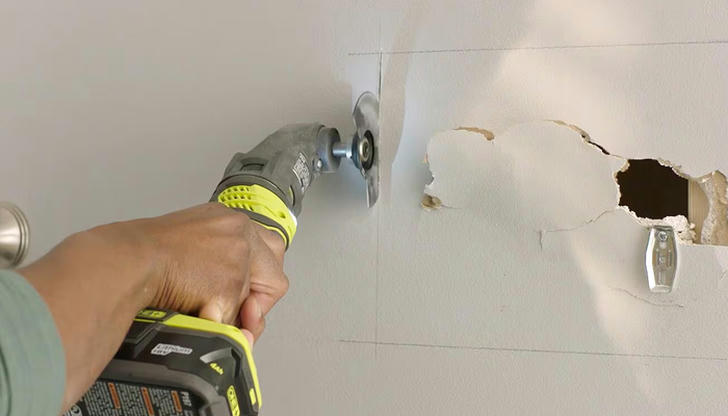
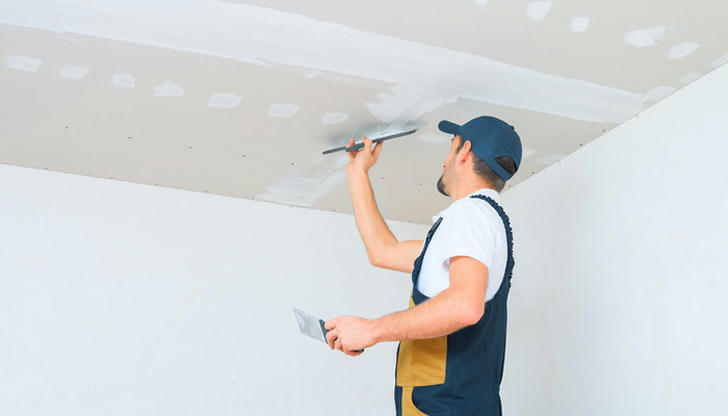
Step 6: Repair Drywall Corners
How to Repair:
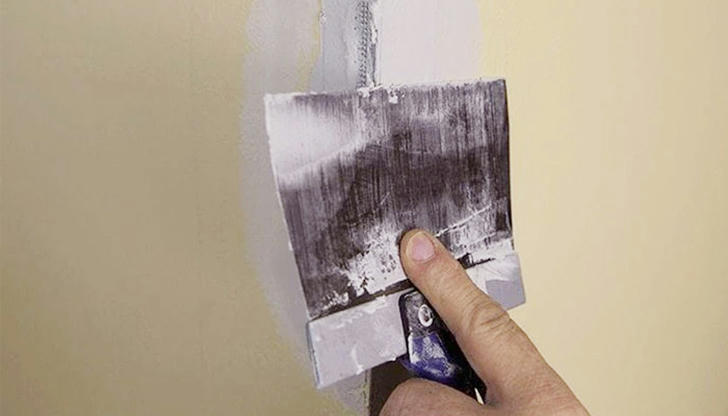
Install Corner Bead: For corners that have been damaged, place a corner bead (a metal or plastic edge) along the corner. This adds stability and creates a straight edge.
Apply Joint Compound: Spread joint compound over the corner bead, using a putty knife to smooth it into the wall. Apply enough compound to cover the corner bead completely.
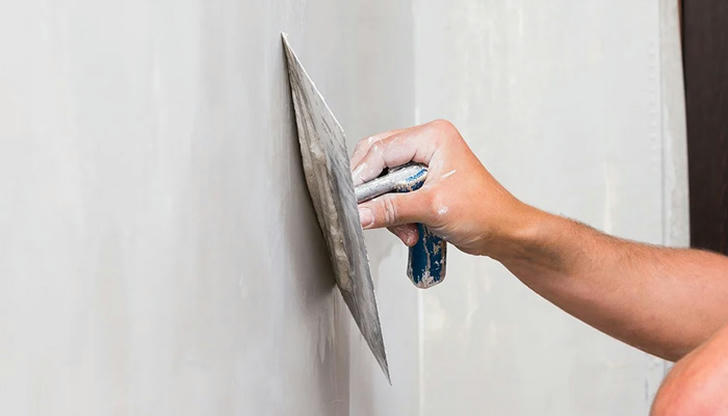
Sand and Smooth: Once the compound has dried, lightly sand it to create a smooth, flush finish along the corner.
Prime and Paint: Apply primer and paint to blend the corner seamlessly with the rest of the wall.
Step 7: Finish with a Professional Touch
How to Finish:
Ensure the Surface is Smooth: After sanding, check the repaired area to make sure it's completely smooth and level with the surrounding wall. This step is crucial to avoid any visible seams.
Match the Wall Texture: If your wall has a textured finish (like knockdown or orange peel), you'll need to match the texture over the repair. You can use a spray texture to replicate the look.
Prime and Paint: Once the texture is dry, apply primer, then paint the entire wall for a consistent finish.
Step 8: Avoid Common Mistakes
How to Avoid Issues:
Overfilling the Hole: Applying too much joint compound can create a bumpy, uneven surface. Always apply thin layers and build up if needed.
Skipping the Sanding: Sanding between layers of compound is crucial for a smooth finish. If you skip this, the wall will feel rough or uneven.
Not Using Primer: Primer helps the paint adhere properly and ensures a consistent finish across the repair area. Don't skip this step!
Step 9: When to Call a Professional
When to Seek Help:
Large Holes: If the hole is larger than 6 inches, or if it involves multiple layers of drywall, consider calling a professional.
Water Damage: If the drywall has been affected by water damage, it may need to be replaced entirely.
Structural Issues: If you suspect the damage involves structural elements like beams or framing, it's best to consult a professional.
Conclusion
Repairing drywall doesn't have to be complicated. With the right materials, tools, and a bit of patience, you can fix holes, cracks, and corners like a pro. By following these steps and taking your time to ensure a smooth finish, you'll restore your walls to their original state---no professional help needed!